Did you know that you can embroider your photographs?
Not only is photo embroidery a fun crafting project, but mixed-media artists have used it to create amazing masterpieces.
In this tutorial, I’ll give you a step-by-step guide to get started in this beautiful and relaxing practice.
Embroidery has brought people together for centuries, and it’s a tradition that’s been passed along generations.
Recently, it’s also been cherished by people who want to free their minds as they give their hands something to do.
Whether you want to use it as a mindfulness exercise, enrich your cherished moments, do a crafting project or make a work of art – photo embroidery is a wonderful practice.
Let’s give it a try, shall we?
More fun DIY photo projects:
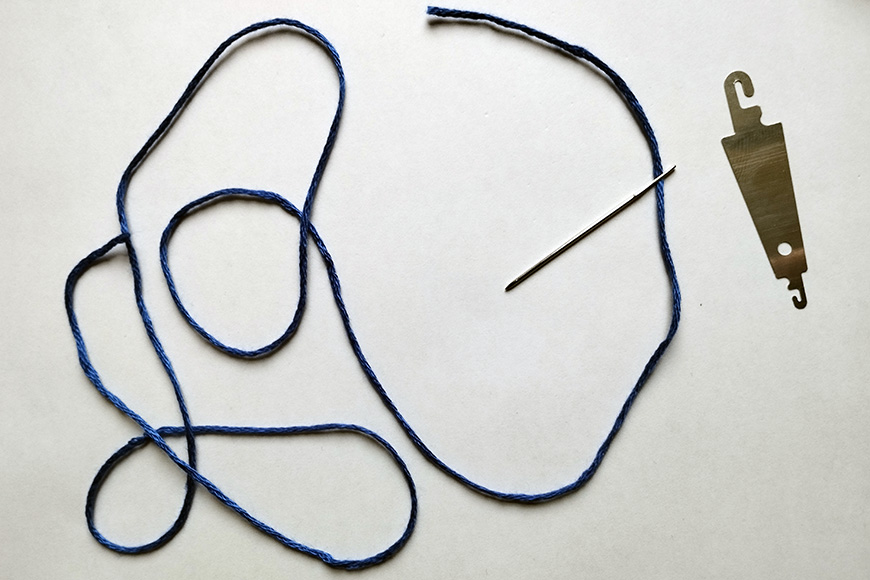
Materials
- Photo
- Threads
- Needles
- Tracing paper (optional)
- Scissors
- Cardboard/soft cloth
- Thimble (optional)
- Piercing tool (optional)
- Needle threader (optional)
Process
These are the basic steps to do photo embroidery. However, this is just a starting point for you to start experimenting and finding your own workflow.
Step 1
Credit: Anna Shvets
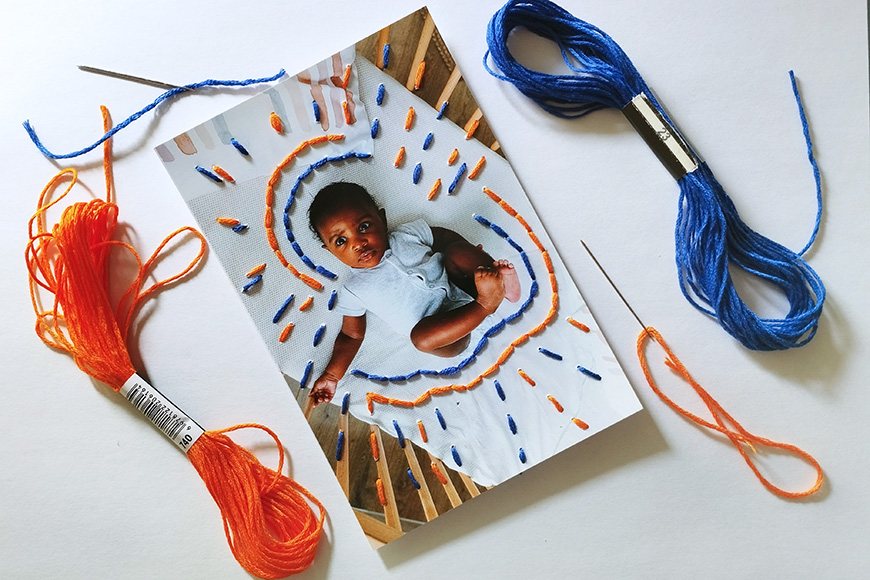
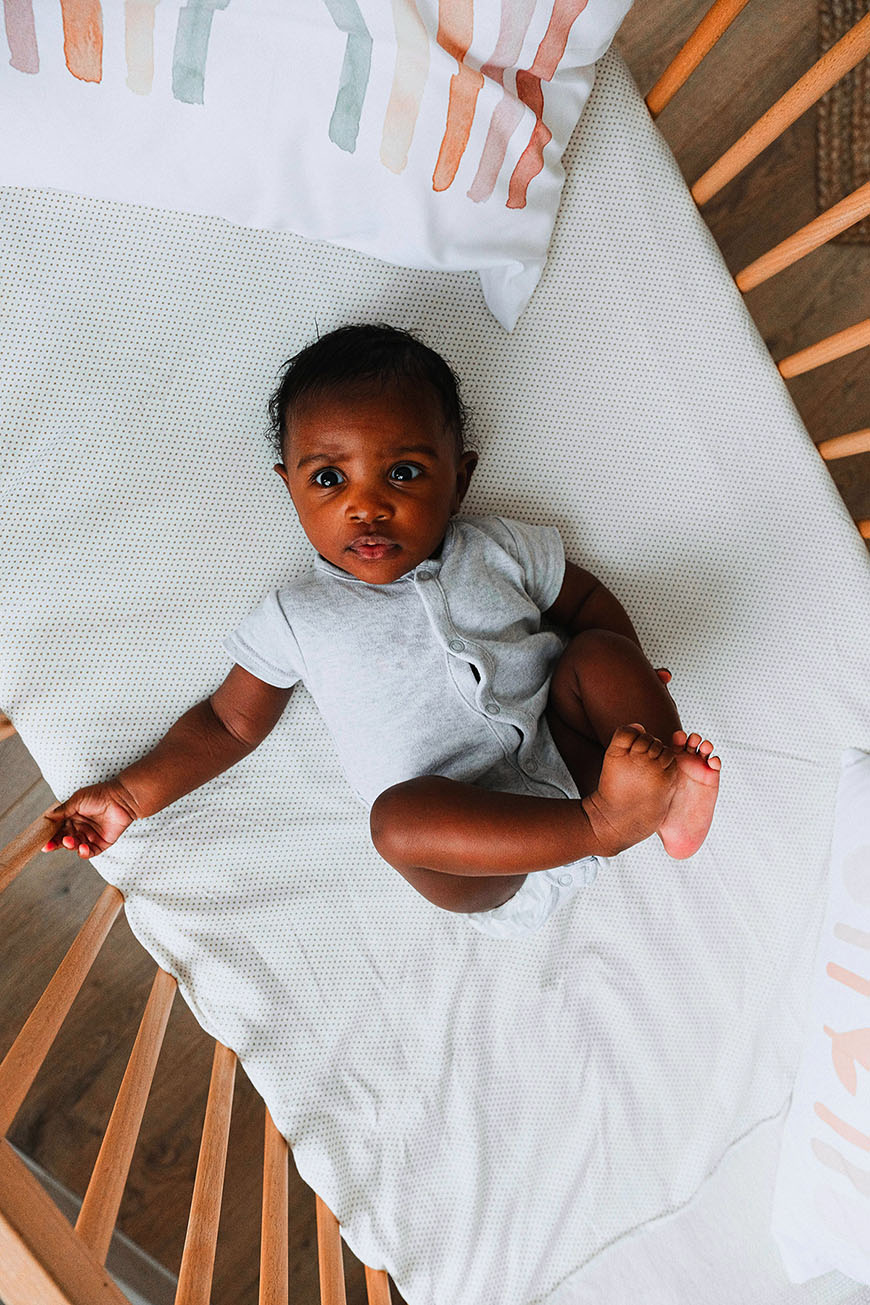
The first step is to select the photo you want to work with. You can do photo embroidery on any image, whether black and white or colored, and whatever subject you like.
My only recommendation is not to work directly on an original vintage photo if you’re a beginner. Also, just in case, make a digital copy before working on it.
This isn’t a problem with digital photos, of course, because you can always make another print if something goes wrong.
Another piece of advice I can give you is to practice your stitches on pictures that you don’t care about, or even postcards.
Step 2
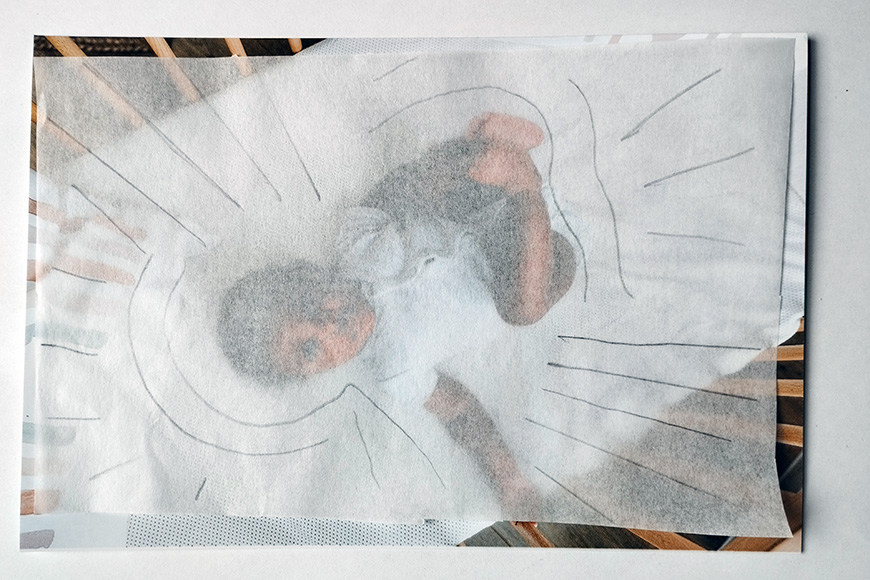
Choose the design you want to use on your photo. Of course, this is optional. You can also work as you go, especially if you’re highlighting elements in the photo.
However, if you’re adding elements, I always like to have an idea from the beginning. You can use tracing paper to create a design that complements your photograph.
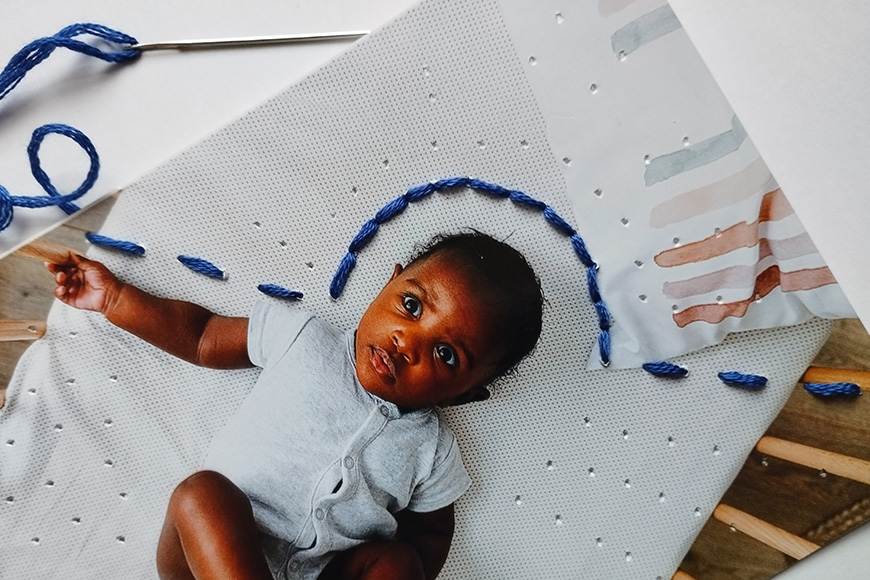
Step 3
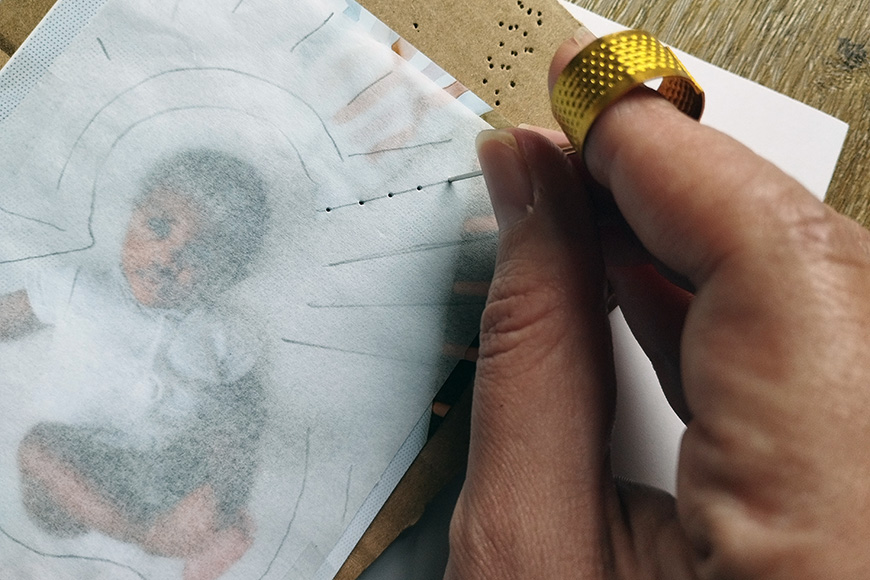
Leave the tracing paper on top of your photo and start piercing the photograph. This serves two purposes: First, it will serve as a guide for your design. Second, it will make it easier for you to go in and out of the paper without tearing it.
Remember that it’s just a starting point; you can always add more piercings as you go along. On the other hand, you can’t restore a hole you have already done unless you hide it with some thread passing over it. So, it’s better to start with just a few punches.
It’s also important to mention that you should make the puncture from the front to the back of the photo.
The distance between punches depends on the effect you want to achieve, the type of stitch, and the thickness of the thread.
You can practice this on a discarded photo to decide what you want to do with your real photo embroidery piece.
The best way to do the piercing is by using a piercing mat, which can be a soft cloth or a thick piece of cardboard below the photo.
How Much Do You REALLY Know About Photography?! 🤔
Test your photography knowledge with this quick quiz!
See how much you really know about photography…

Then, use a piercing tool if you have one. Otherwise, use the needle, but protect your finger with a thimble.
Step 4
This is a standard embroidery thread with six strands.
Now, prepare your thread.
Of course, the first thing you need to choose is the colors you’ll be using.
You should also decide how thick you want your embroidery. The standard thread has 6 strands – you can use it as it is.
However, you can separate a few strands to make it thinner. This works better on intricate designs or simply when you want to make the embroidery more subtle.
It’s also possible to mix different-colored strands or to double the standard thread to make the three-dimensional effect more noticable.
You can experiment with discarded photos and decide which one you want for your final project. It’s also possible to mix different styles in the same photo.
The size of the needle is also important, and it’s closely related to the number of strands you’ll use. Although you can thread the needle with your fingers, a needle threader can make your life easier.
Remember to make a knot at the end of the thread, making it as close to the end as possible. Otherwise, use scissors to cut the extra thread.
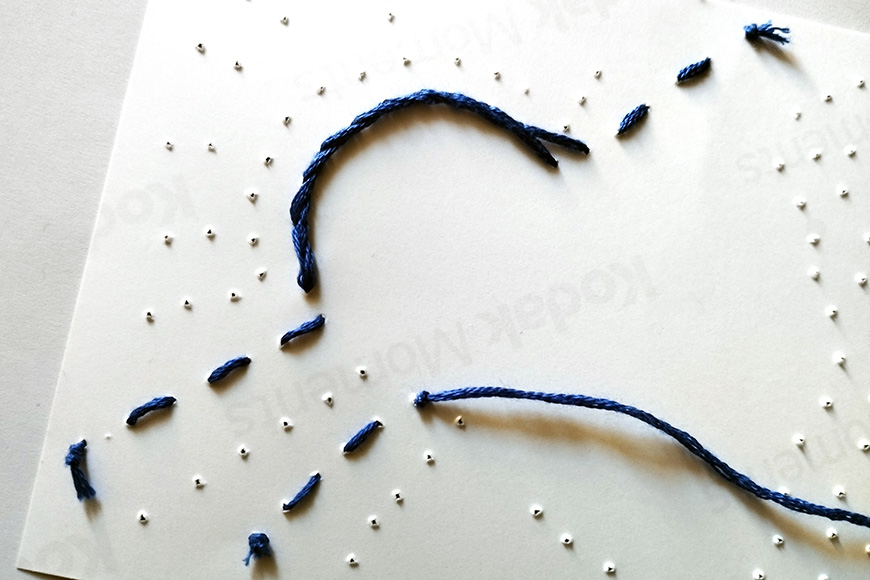
Step 5
Now, it’s time to start embroidering. Always start from the back to the front – this way, the knot will be hidden.
It’s also a good idea to stay a little far away from the edge of the picture to avoid any risk of tearing it.
There are many types of stitches, and most fabric stitches work on paper, too. Just remember that paper is more delicate and can tear easily – this depends, of course, on the type of paper. So, only do stabbing movements, not sewing ones.
Also, once you pierce it, there’s no going back, unlike fabric. To start, you can use the backstitch and the running stitch, which you can see in the photo above.
Then, you can learn other stitches to make more complex designs.
Remember that the stitch creates the texture. So, choosing one over the other will have a great impact on the final design.
Step 6
Every time you finish a line or run out of thread, you need to make a finishing knot. Otherwise, the embroidery can come undone.
Simply make a loop and use your finger to keep it as close to the paper as possible.
Some people prefer to use tape instead of knots to fix the threads in place. Choose the method that you feel more comfortable with.
Step 7
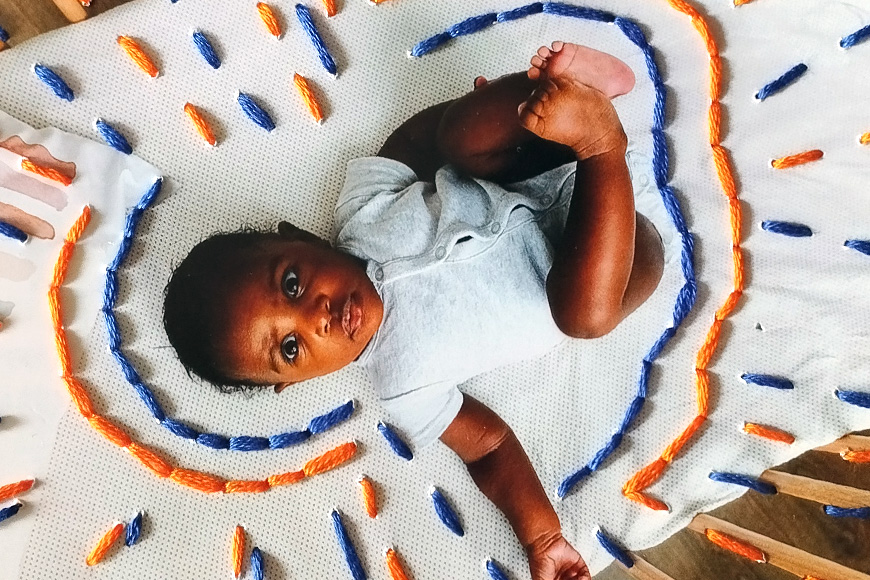
That’s it. Just keep going until you’re happy with the design. It’s OK to modify the original idea as you work; I often end up adding more stitches here and there because once I put my idea into a real piece, it may look a bit different.
So, practice and have fun. There isn’t a right or wrong here – it’s your art!
Credit : Source Post


