Achieving a pure white background in product photography can be tricky. Thankfully, it’s gotten so much easier thanks to advances in photo editing software and gear being more accessible.
Like so many photographers, I cut my teeth editing hundreds of white backgrounds.
I’m going to share some key takeaways from my experience with creating a white background, including camera settings to use and how to use a light box.
Creating a plain white background isn’t as hard as it seems. Here’s how it’s done!
Why Use a White Background for Product Photography?
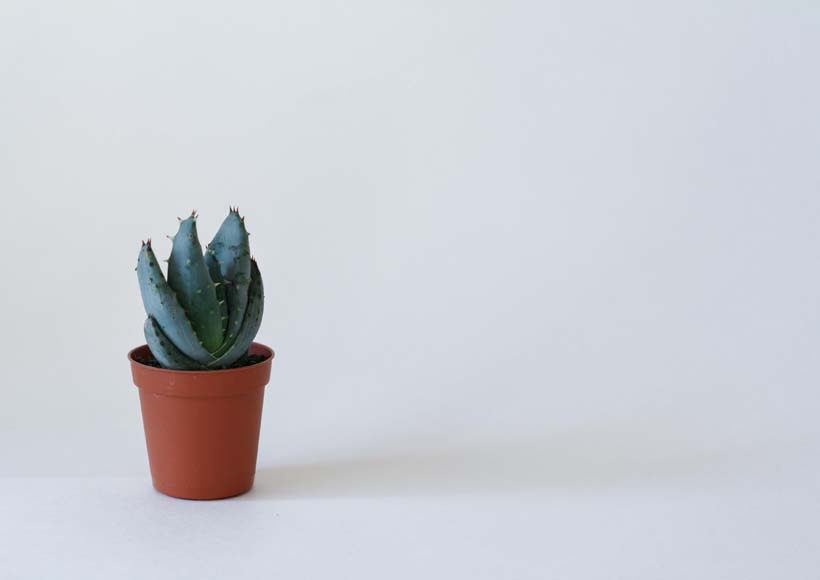
Image Credit: KATRIN BOLOVTSOVA
Before I get into the product photography tips, I want to touch on why it’s so important to create a uniform white background in your product shots.
This is something that even professionals who run a product photography studio might have lost touch with. We use these uniform, neutral tone backgrounds to make it easier for customers to focus on the product and scroll through online shopping pages.
The same basic rules apply if you’re working on a physical product catalog that will be printed on paper.
More complicated backdrops are saved for advertising or banner images, but the nuts and bolts of shopping happen with these neutral backgrounds.
Equipment Needed for White Background Product Photography
I couldn’t get too far without talking about the gear that you’re going to need for this particular style of photography.
The good news is that if you already own a camera, you can get away with spending as little as $1 to get started with product photography.
White Photography Backdrop

It’s not pretty, but the shots it helps me get sure are!
There’s never anything wrong with the classics, and this includes your standard cloth photography backdrop.
I highly recommend investing in a white cloth photography backdrop. Not only can you use this for product photography, but it’s also great when working with models or taking corporate headshots.
My photography backdrop has been a part of my photography kit that has lasted me longer than my last three digital cameras. These things really pay for themselves.

At some point, every photographer needs an iron they can rely on.
There is one piece of kit that you’re not going to find at B&H that is essential for any photographer. If you’re using cloth backdrops, you absolutely need to own an iron.
Ideally, you should pick up an iron that has a vertical steamer setting. This does wonders for getting out some of the worst wrinkles in a backdrop.
Light Box
Light boxes are very popular for contemporary product photography.
They’re very affordable and they allow you to shape and control light for small to medium-sized product photos.
These are ideal for creating a quick setup when you don’t plan to take pictures of anything that’s much bigger than the size of a soccer ball.
Poster Board Sheet

This costs around $1 and is a key part of my photography kit.
A sheet of poster board is going to be your best friend when you get into product photography.
White foam board allows you to create an instant neutral backdrop for any photograph. These thick paper boards can also be used as a bounce card when you don’t need them to be in the frame.
How Much Do You REALLY Know About Photography?! 🤔
Test your photography knowledge with this quick quiz!
See how much you really know about photography…

You can pick up a sheet of cheap white foam core at your local grocery or art supply store for one to five dollars.
It’s an ideal option for anyone on a budget, and you’ll get results that look 100% professional.
DIY Light Box

Two folded poster board sheets held together with white gaffer’s tape creates the most affordable light box out there!
I couldn’t go through this guide without giving you a quick rundown of how I make my own light boxes.
Rather than spending a bunch of money buying a one-size-fits-all solution, I have my own modular light box that I made for less than $5.
All you need to do is buy a few sheets of white poster board, fold them in half, and tape two of them together end to end. This creates a poster board light box that can also be used as an L-shaped photo backdrop.
You can make one light box as big and another as small as you need it by simply cutting down your poster board.
For a more detailed version using a cardboard box, check out this guide: How to Make Your Own DIY Light Box.
Lighting

I use a variety of lighting options to take product photography.
My typical setup involves using a bounce card, a large studio light with a dome diffuser, and a few smaller LED panel lights to help fill shadows and add highlights.
I get that that can be an expensive setup that might be overkill for a new photographer, but there’s a free light source that you can also use for product photography.
The sun is an excellent option. You just need to be able to work with inclement weather and make sure to take your shots when you have clear skies so you can get a good white balance without things looking gray and washed out.
Lighting Setups for White Background Product Photography
You’ve got two essential options when it comes to how you’re going to light your product photography.
You can either use natural lighting from the sun or you can use a controlled lighting setup with LEDs.
Here’s how to set up both and how to deal with common problems that will pop up regardless of which lighting setup you pick.
Natural Light
Natural light is free and abundant. This makes it a great choice for product photography, but it also means you have to work with the sun rather than take control of the lighting yourself.
My best advice is to find the brightest spot in your home that gets the most natural light. This will be your natural-light product photography studio for the rest of your shoot.
Natural light can also be harsh and cast unflattering, raking shadows. You’ll want to soften that light up by either buying a photography light diffuser or hanging a sheer curtain over your windows.
A bounce card, even a white poster board, can help reflect light back onto your subject and reduce unwanted shadows.
You’re going to have less control over creating the same shadow tone using natural light then you will with artificial light.
Keep in mind that natural light changes color throughout the day and can have hues of blue and yellow.
You’ll need to adjust your white balance in post-production to ensure that you get the right colors in your final edit.
Artificial Light
Artificial lighting setups can be expensive, but they’re going to give you total control over color temperature and shadows.
An entry level professional lighting setup is going to cost you a few hundred dollars at the least.
Unlike shooting with natural light, shooting with artificial light gives you infinite options when it comes to how you configure your shot.
I use three-point lighting for most of my product photography shots. Three-point lighting uses a key light, fill light, and a backlight to control shadows and evenly light your subject.
- Key Light: This is the main light, and typically most powerful one. It does the legwork of lighting your scene
- Fill Light: The fill light cancels out some of the shadows from the key light and evens out the lighting across the front of your subject
- Backlight: As its name suggests, the backlight, often called the hair light, fills in the shadows behind your subject and helps lift it off the backdrop
You can get some more pointers in our Beginner’s Guide to Photography Lighting Techniques.
What to Use for a White Background for Product Photography
If you need a white background for your product photography in a pinch, here’s an exhaustive list of everything that you can use to create this effect regardless of your budget.
- Light box
- Soft box
- Photography backdrop
- White sheet or blanket
- Flat white wall
- White t-shirt
- Poster board, construction paper, or unlined A4 paper
You’re sure to have one of those options on hand.
However, if you don’t have anything on that list, I’ll show you how to edit a white background in Photoshop no matter how you have to shoot your product photo.
How to Get a Pure White Background for Product Photography In Camera
I am always a fan of getting the best shot you can in camera. The better the photograph you take, the more you have to work with when it comes time to edit in post-production.
Let’s get things off to a strong start by taking the best picture we can for some in-camera product photography.
Step 1: Setup and Lighting
The most important thing you can do to get a good white background in camera is to properly set up your shop.
You want to really take your time focusing on getting even lighting that has the color tone you’re looking for.
If you don’t want to do any color grading in post-production or spend time in Photoshop removing awkward shadows, this is just the work you have to do.
I typically spend much more time setting up my shot and adjusting lighting than I do taking pictures or editing.
This is just the name of the game when it comes to working towards an in-camera aesthetic.
Step 2: Take Your Shot

No edits and fresh out of the camera roll.
Firstly, adjust your camera settings so that the white balance and exposure are as close to correct as possible.
You can use a grey card to set your white balance more accurately.
Take a few test shots and double-check how they turned out.
After spending a while working on this shot, I just wasn’t getting the exposure I was looking for with my lighting setup.
I decided to go with one of these shots that was slightly underexposed and make some minor adjustments in post production.
Step 3: Minor Touch Ups

A minor crop and exposure adjustment created this final edit.
I think this product shot turned out great. I achieved the white background in camera and only had to crop and make a minor exposure adjustment and post-production.
Under different lighting conditions, I might have been able to pull this off entirely in camera.
How to Get a Pure White Background in Photoshop
If you can’t get the shot right in camera, then editing in a program like Photoshop will help make life easier.
Photoshop might be intimidating, but it makes achieving a white background that much easier.
Take Your Shot

Need to borrow some gaffer’s tape?
Like I said earlier, you want to give yourself the best possible photograph to work with. I still took time to get my lighting right and compose the shot that I wanted to capture.
The shadows in the background weren’t working with me today, so this shot was one of the few that I had to take to Photoshop for some final edits.
Use the “Remove Background” Tool

This might have taken me hours a few years ago painstakingly tracing the edges of this product and masking out the background.
However, Photoshop now has a built-in tool for removing background that can automatically delete the background of any shot you take.
All you need to do is tap the remove background button and make some adjustments to which areas of the photo are being masked out.
I think this might be the easiest feature Photoshop has ever introduced.
Make Final Touch Ups

I used an off-white background for this image to contrast against the white tape.
Things aren’t done just yet.
I like to finish up my Photoshop work by doing final touch-ups. This includes making sure the mask falls exactly where I wanted it to and adjusting the color and brightness of my subject.
How to Edit White Background Product Photography
Now, I want to walk through the most common editing situation I wind up in for product photography.
I’ll take a shot that’s not quite ready out the gate, but also not bad enough to need Photoshop.
Here’s my typical workflow when using an app like Lightroom to edit product photography.
Step 1: Make Basic Edits

My edit starts by taking the rough initial photograph and bringing it up to a workable state.
This mirrors my workflow for essentially any photograph and covers the basics like lens correction, cropping, and adjusting exposure.
Here’s a bullet point walkthrough of how I start my Lightroom edits.
- Lens Correction & Chromatic Aberration
- Crop and Geometry
- Exposure and Color Correction
- Healing Tool for Creases, Shadows, and Blemishes
Step 2: Final Touches

The final touches are all about creating that uniform white background and making sure that the product looks good. Even a beat-up guitar amp like this can be cleaned up to look compelling.
Pay close attention to the white background to ensure that there aren’t any stray hairs or other problems that could be spoiling an otherwise perfect shot.
Now’s also the time to make any final changes to the exposure or color correction.
Keep in mind that changing the color correction can change the background color as well. This is often caused by color falling off the subject and reflecting on to the white backdrop.
3 Tips for Perfect White Background Product Photography
I want to close up this article with a few key tips for ensuring that your white background photography always turns out right.
Tip 1: Work With Your Lighting
Lighting is your best friend, but if you don’t work with what you’ve got, it can easily become a nightmare.
Whether you have thousands of dollars in professional lighting equipment or you’re working with the weather, your lighting is going to dictate how your product photography turns out.
Take your time to really learn how your lighting setup works and how you can make the most of it.
This will ensure that your product photography always has an even exposure and excellent color.
Tip 2: Try New Shots and New Angles
There have been plenty of times while shooting product photography that I have just been totally unable to get the shot I want. Rather than getting frustrated, I like to change up my scene.
Try rotating your product, shooting it from a different angle, or playing around with how the shadows fall to get your shooting session back on track.
You can even try throwing in a few props if your clients are all right with a slightly more creative product photo shoot.
Some classic options include flowers, empty photo frames, or a natural pairing like designer shoes and jewelry.
Tip 3: Get Outside Help
Don’t be afraid to call for help if you find yourself stuck in a particularly difficult editing job.
I know photographers who rely on professional photo editing services when they have hundreds of product photos that they need to edit on a short turnaround.
I know other photographers who rely on these services when they get stuck on a particular edit that they just don’t have the skills for.
Professional services, other photographers, and even online tutorials can provide the resources you need to get through an edit you’re otherwise stuck on.
White Background Product Photography Apps
You have so many options when it comes to creating a white background using an app.
To be honest, I create most of my product photography using mobile apps rather than desktop photo editing software.
My main go-to is Lightroom Mobile, but there are plenty of options you can consider if you want a lightweight way to create product photography.2
Also check out this guide: Apps for Making a Background White.
FAQ
Should product images be on white background?
White is the standard color for product photography backgrounds, but other neutral tones like gray and black are fairly common. Neutral tones help promote a uniform visual experience and make it easy for potential customers to search through a product catalog.
What color background is best for product photography?
The best color for product photography is a neutral like white. More complicated backdrops are typically reserved for advertising photography rather than the type of photography that shows up in product listings, catalogs, or the shopping pages of a website.
What is the best white backdrop for product photography?
The best option for a white background for product photography is going to be a cloth photography backdrop. A light tent or even natural lighting on a piece of white poster board can give you very similar results.
White Background Photography | Final Thoughts
Now you’ve got all the skills you need to shoot your own product photos.
It really doesn’t matter if you’re already doing professional product photography or you’re a total beginner just looking for a few new ways to optimize images for your next blog post; creating a white background is something anyone can do!
Let me know your DIY product photography questions down in the comments and I’ll make sure to answer them in an upcoming photography article!
Credit : Source Post


