This is a guide exploring how to keyframe in DaVinci Resolve.
Keyframes are a common tool used in animation, but can also be applied to a variety of video editing processes.
They open up many post-production opportunities to manipulate your footage for more dynamic videos.
Keyframes are also great for introducing animations and heightening effects and transitions.
This guide breaks down all the basics you need to get started adding keyframes to projects in DaVinci Resolve.
Keyframing in DaVinci Resolve for Video, Audio, and Images
A keyframe is an anchor point on a video’s timeline that instructs the software when a given effect begins and ends.
Commonly used in animation, keyframes can be used to establish and adjust one parameter over the duration of the video.
By establishing position A and position B, you can use keyframes for transitions, motion, and other great editing tricks.
Basic keyframe controls and interface

Adding, removing, and navigating through keyframes can all be managed in the Inspector Panel’s options.
Keyframes can be added to control a wide range of processes in DaVinci Resolve, from video and audio to animating logos and altering effects.
Before we dive into the specific applications of keyframes, it’s important to have an understanding of their general application.
Whatever result you’re hoping to achieve with the use of keyframes, the functionality to add them remains broadly the same.
To view the core keyframe controls in DaVinci Resolve:
- Open your DaVinci Resolve project and head to the Edit tab.
- Click on Inspector in the top right-hand corner of the user interface.
- Select the category you wish to alter – for example, Video, Audio, Effects, or Transitions.
- To add a keyframe to a parameter, click on the diamond icon to the right of the values to turn it red.
- To skip to the previous or next keyframe in the timeline, click on the arrows on either side of the keyframe button.
- To undo keyframes, click the circular arrow icon to the right of the keyframe buttons.
The selection of Video tools is extensive, covering everything from cropping and zooming to lens correction and image stabilization.
While keyframes can be added on other Tabs, such as the Color Tab, this tutorial will keep it simple and cover keyframing via the Edit Tab.
Applying keyframes to video clips

Using the main timeline marker, you can add keyframes to specific frames in DaVinci Resolve quickly.
Keyframes are a great way to introduce smooth transitions and manipulate your video clips in a variety of ways.
You can use them to transform a video clip, bringing it to the center of the screen from the sides or gradually zooming in as it plays.
DaVinci Resolve also allows you to add additional keyframes for more dynamic editing, linking, and combining various processes.
Follow these steps to apply keyframes and make changes to your video clips:
- Open your DaVinci Resolve project and head to the Edit tab.
- Navigate the playhead to the point on the video clip where you want to create the first keyframe.
- In the Inspector panel, go to the Video settings and click on the keyframe icon for the effect you wish to use.
- Navigate to the frame where you want the effect to end and adjust the effect’s parameters in the Inspector panel. For example, if you’re performing a zoom-in, use the Zoom controls in the Transform options by clicking and dragging in the desired direction.
- The second keyframe is automatically added once you’ve made this change.
There are many useful tools you can use combined with keyframes to create a range of visual effects.
Pans, zooms, and other camera movements can all be added using this process in your post-production editing pipeline.
This makes it a great way to maximize footage, for example, master shots, to increase the amount of potential coverage from your shoots.
Applying keyframes to audio

DaVinci Resolve can also be used to add keyframes for a range of audio effects and parameters.
In addition to adding keyframes to manipulate your video footage, DaVinci Resolve also allows you to add keyframes to control audio.
This can be a handy way to introduce fades in and out at specific points in your video or perform other audio-related changes.
As with using the keyframe editor for video, you can take more control over these changes during the clip’s duration by using the curve editor.
If you want to apply keyframes to your audio clips, here’s what you need to do:
- Navigate the playhead to the point on the clip where you want to create the first audio keyframe.
- In the Inspector panel’s Audio settings, click on the keyframe icon for the desired effect you wish to use.
- Navigate to the frame where you want the effect to end and adjust the audio parameters in the Inspector. For example, if you’re fading out music, lower the volume setting to the desired level.
DaVinci Resolve has a solid selection of audio values you can also use when adding keyframes to control your soundtrack.
In addition to adjusting the volume and panning audio, you can use various tools for voice isolation, equalization, and leveling dialogue.
You can also alter the pitch of your audio, as well as change the audio’s speed, complementing the mixer also available in DaVinci Resolve.
Using keyframes to animate logos
Adding multiple keyframes allows you to include more complex animations of logos and other graphics in DaVinci Resolve.
If you have any experience in animation, chances are you’re already aware of the concept of keyframing when creating motion in the medium.
DaVinci Resolve offers plenty of scope for adding keyframes to move, scale, rotate, and otherwise animate logos and other graphical elements.
This can be something simple, such as getting your YouTube channel logo to slide onto the screen and any other desired effect you’re hoping to achieve.
Here’s how you can use DaVinci Resolve’s keyframes to animate logos and graphics:
- Import an image/logo into DaVinci Resolve and add it to your project’s timeline in the Edit Tab.
- Select Transform from the drop-down menu in the bottom left-hand corner beneath the video preview window.
- Choose the first frame where you want the animation to begin and set a keyframe.
- Move along the timeline until you reach the point where you want the second keyframe to be.
- In the video preview window, reposition and make other alterations, such as scaling the logo, to create a basic animation. You can see how each parameter is affected in the keyframe editor window.
- Add keyframes as needed for additional motion and other effects you wish to apply to the logo.
You can also use the option to show transform tools when editing keyframed video clips as an alternative to adjusting the parameters outlined above.
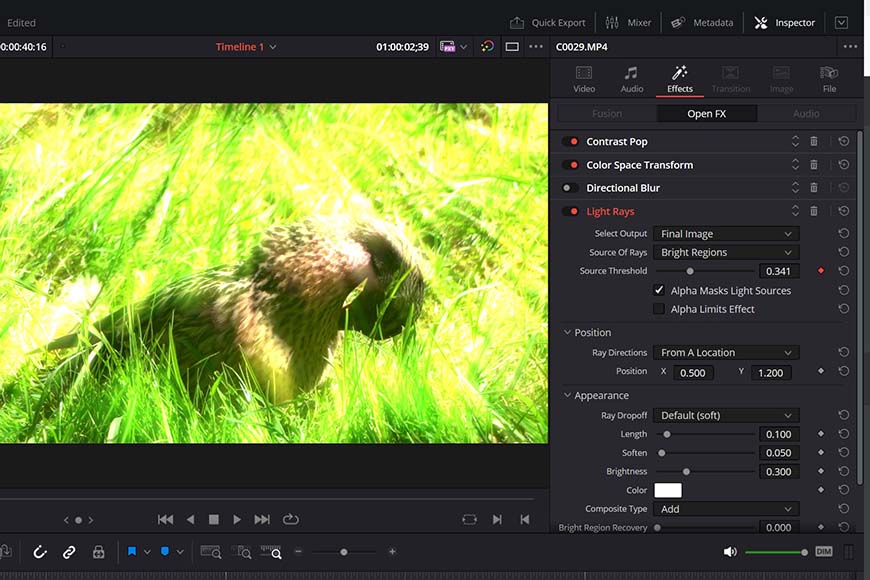
Applying keyframes to effects

If you want to have more control over how and when effects are used, DaVinci Resolve’s keyframes can be applied to these.
DaVinci Resolve comes with many powerful effects for video editors to apply to their footage to create more aesthetically pleasing content.
They’re a great way to enhance a transition from one scene to the next or create a distinct look, such as a VHS tape or old 8mm film footage.
Whatever effect you wish to use, keyframes are available to help you control when and how they impact your footage across the timeline.
To apply keyframes to effects, follow these steps:
- Head to the Edit Tab on your project’s timeline and open the Open FX panel in the bottom left-hand corner of the screen.
- Select Filters, then browse through the Resolve FX options to find the effect you wish to apply to your footage.
- Drag the effect from the Resolve FX list onto the video clip you want to apply it to.
- Head to the keyframe editor in the top right corner to view the Effects settings and parameters.
- Add keyframes indicating where you want changes to the effect to start and end.
- Adjust the values of the effect to achieve the desired results.
Editing keyframes on the timeline

Click on the diamond icon in a given clip on the timeline and it will allow you to edit your keyframe positions directly.
While the Inspector panel in the top right corner of the screen is the main area you’ll use to fine-tune keyframes, you can also edit them in your timeline.
By selecting a clip for your video, images, audio, and other elements in the timeline, you can edit keyframes in a variety of ways.
You won’t have full access to every parameter here, but it’s a quick method for adjusting the position of keyframes while editing your videos.
Here’s how you can reveal and adjust keyframes on individual clips on your timeline:
- In the Edit tab, head to the clip on the timeline you wish to view the keyframe information for.
- Click on the black and white diamond icon in the bottom right-hand corner of the timeline clip.
- This will reveal a second bar directly beneath the clip preview in the timeline window, displaying the keyframe positions and type of effect, for example, Transform.
- Additional dots beneath the type of effect represent the keyframes and can be repositioned by clicking and dragging left or right.
It’s a handy method for making quick adjustments to a new or previous keyframe without having to leave the timeline editing space.
Credit : Source Post


