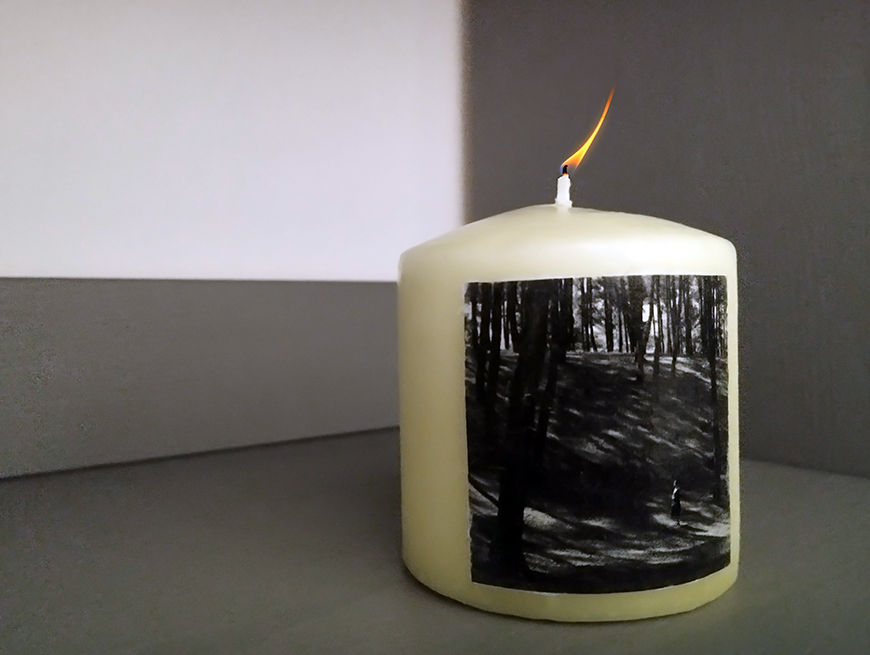
Do you want to make a photo candle but you’re not sure how to do it?
I was curious about it, too, so I started researching how it’s done. All the tutorials I found involved printing your photo on tissue paper.
However, it’s difficult to find a place where they print on tissue paper if you don’t have a printer at home. Even if you do have a printer, you might not be too keen to risk getting the paper jammed inside.
So, I decided to try other methods that involved using photos printed on regular paper. Guess what – it worked!
In this article, I’ll share two different methods for making a photo candle without using tissue paper. If you’re interested in how to do it, keep reading.
More fun DIY photo projects:
Method 1 – Materials
- Candle
- Photo
- Mod Podge Photo Transfer
- Foam brush
- Wax paper
- Hair dryer
- Water
Method 1 – Process
Here’s how you can transfer a photo onto a candle.
Step 1
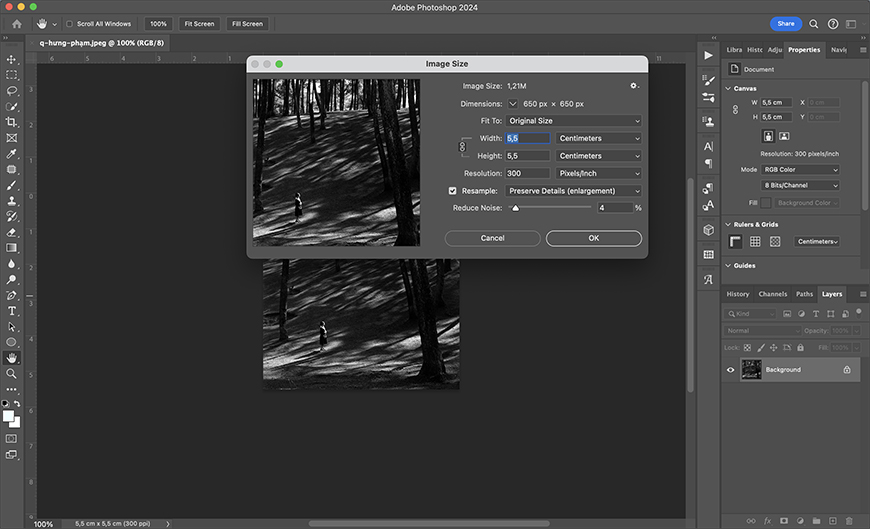
Photo Credit: Q. Hưng Phạm
Choose the photo you want to use and resize it to fit your candle. This operation is pretty basic and can be performed using any photo editor. I used Photoshop.
There are also online photo resizers you can use for free. You should also mirror your image if there’s any text on it.
Step 2
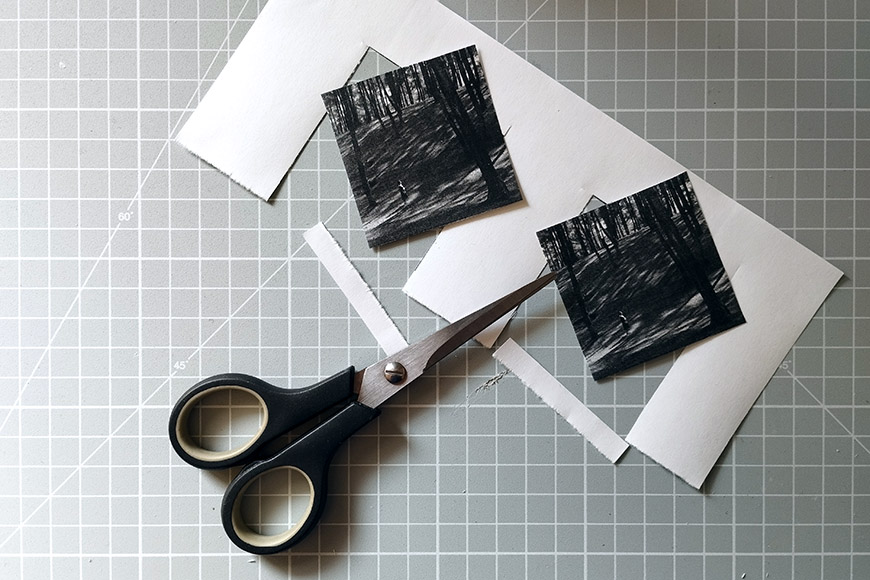
Once you have your photo, print it using a laser printer – it can be color or black-and-white. Then, cut it to size.
Step 3

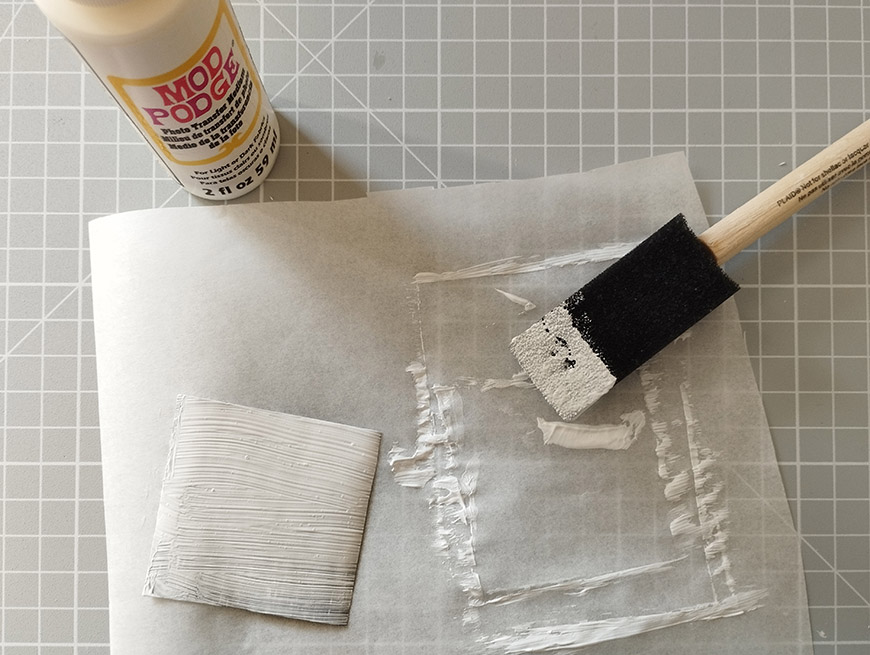
Using a foam brush, cover the entire print with Mod Podge photo transfer. You can also use a regular brush – I just find it easier to work with a foam one.
Make sure you apply an even coat to every area because anything that doesn’t have Mod Podge will not transfer. You can protect your working area with plastic or wax paper, so you can cover the photo all the way to the edge without worries.
Step 4
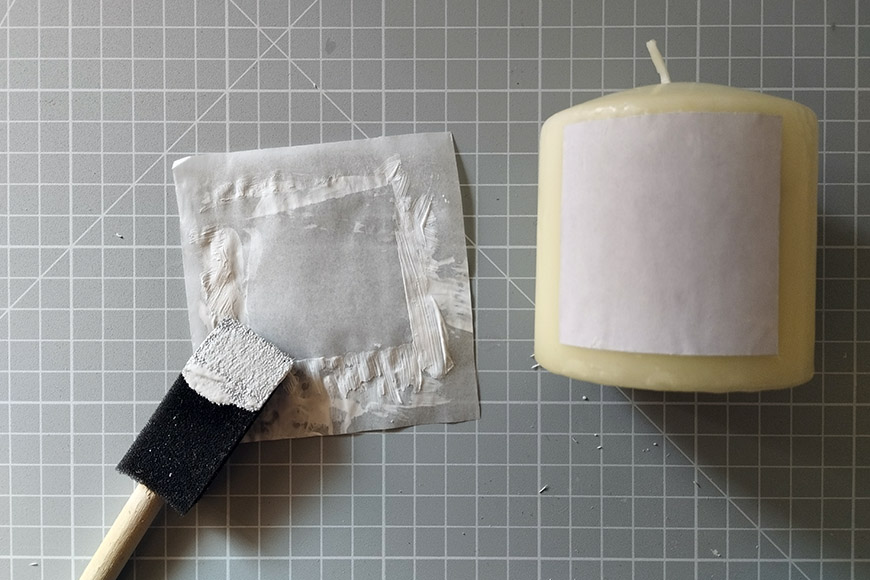
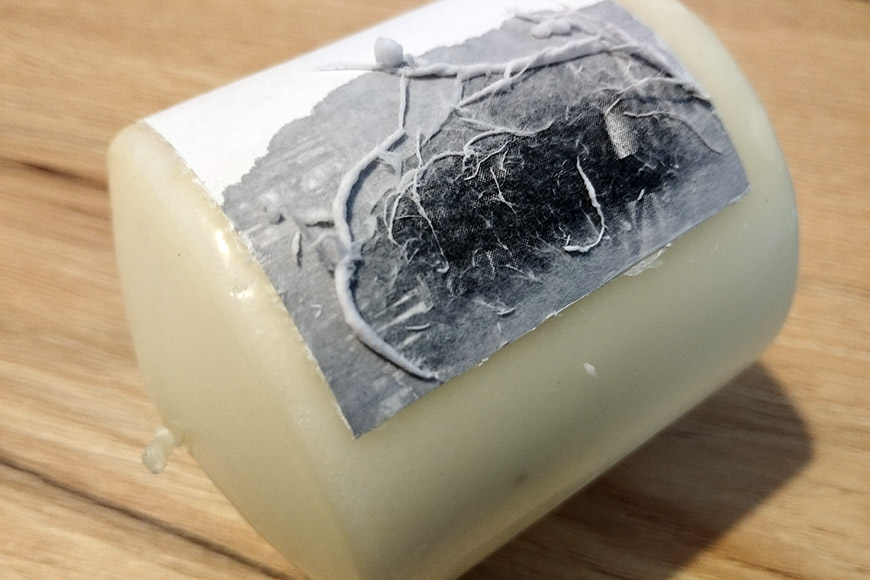
Put the print on the candle with the Mod Podge facing down. You’ll see the blank paper.
Now, leave it to dry for at least 24 hours.
Step 5
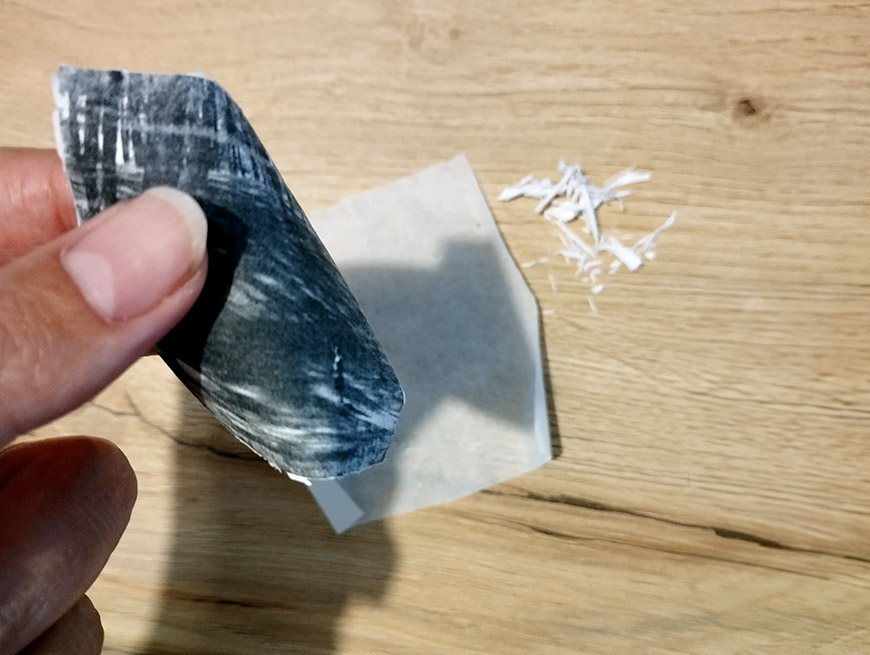
You can start peeling off the paper once the Mod Podge photo transfer is dry. To do so, dampen the paper with your finger or the foam brush and start rubbing.
Don’t rub too hard or you risk peeling the image off as well as the paper. You might need to let it dry and repeat the process a few times to remove the paper.
Step 6
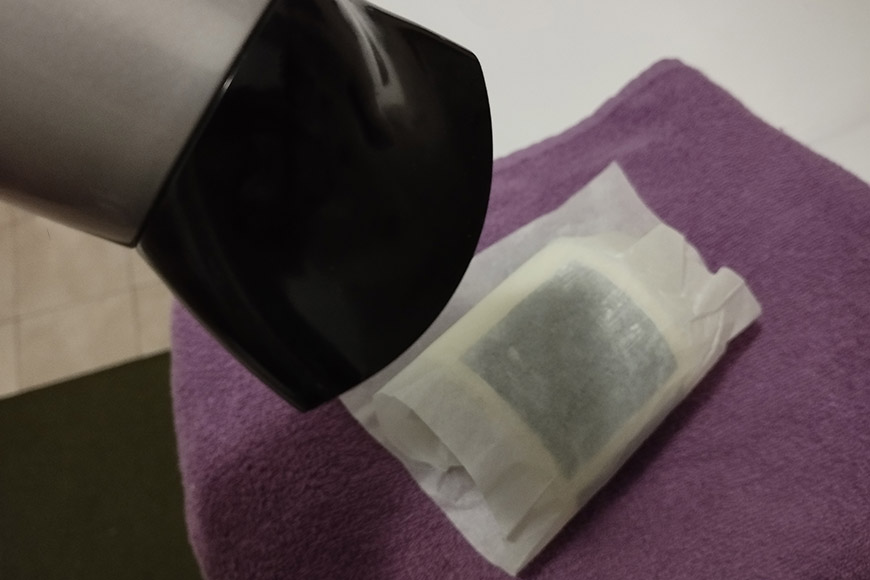
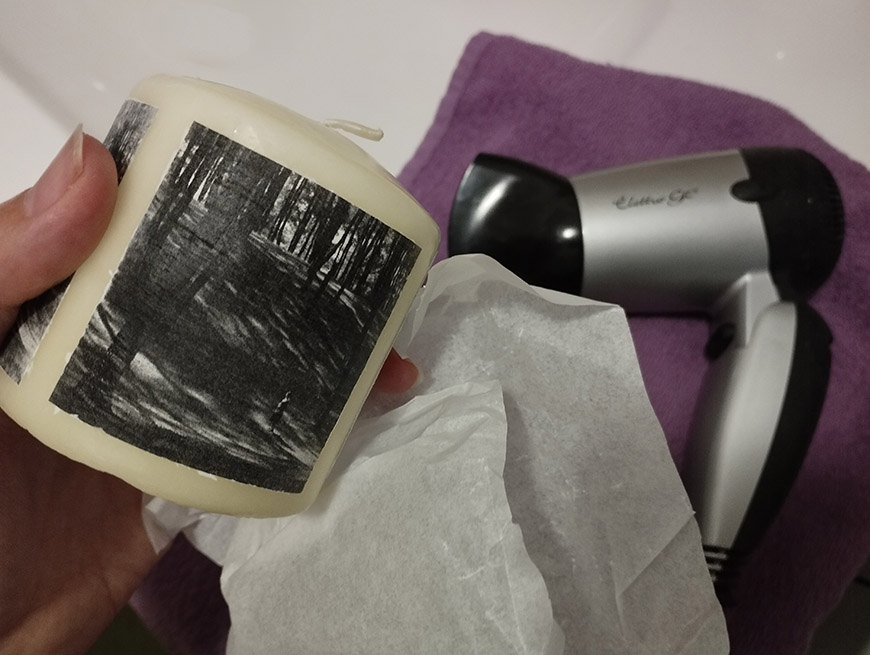
The last step is to set the photo using a hairdryer.
In the other tutorials I mentioned where they use tissue paper, they do this step. So I decided to do it as well.
Although I must say that using this type of paper it didn’t seem to make much of a difference – maybe it’s only needed if you’re using tissue paper.
So, I leave it up to you whether to do this step or skip it. The only benefit I can find is that the melted wax may hold the photo stronger, but it wasn’t a noticeable change.
However, if you decide to do it, you need to cover the candle with wax paper. Then, hold it while protecting your hand with a cloth or an oven mitt and start warming it with the hair dryer.
How Much Do You REALLY Know About Photography?! 🤔
Test your photography knowledge with this quick quiz!
See how much you really know about photography…

It’s also possible to place the candle on the counter instead of holding it so you won’t burn your hand. Just make sure it’s a safe surface that can handle the heat.
Method 2 – Materials
These materials are the same as those for the first method. The difference is in how you use Mod Podge during the process, so pay close attention there.
- Candle
- Photo
- Mod Podge Photo Transfer
- Foam brush
- Wax paper
- Hair dryer
- Water
Method 2 – Process
Here’s how to transfer a photo onto a candle using a decal. This method is also useful if you have a glass jar candle as the decal clings to glass surfaces.
Step 1
The beginning of this process is the same as that of the first method. You need to choose a photo, resize it, and print it on a laser printer.
In this case, you don’t need to mirror the image. Then, cut it to size.
Step 2
Now, apply the Mod Podge photo transfer to the print using a foam or regular brush, making sure to cover all of it.
This step is the same as the one from the first method. However, things change in the next step, so be aware.
Step 3
Once you have the print covered in Mod Podge, you don’t need to put it on the candle as you did with the first method. Instead, just move it into a clean piece of wax paper so it doesn’t stick to it. The Mod Podge must still be facing up.
Leave it to dry for at least 24 hours.
Step 4
Once the Mod Podge is dry, turn over the photo. At this point, the Mod Podge is facing down, and you have the paper facing up.
You can now wet it and start peeling off with a foam brush or your finger. Again, you may have to let it dry and repeat the process.
Step 5
Once you’ve removed all the paper and the print is dry, carefully peel it off the wax paper. This is called a decal, and it’s normally used to transfer photos into glass – that’s why you can use this method for jar candles, too.
You’ll notice it’s thin and delicate. Handle it carefully and place it on the candle with the Mod Podge facing down and the image facing up.
Pass your fingers through the edges to make it stick well, and be careful not to tear it.
Step 6
Now, cover the candle with wax paper and heat the area over the photo with a hair dryer. Hold the candle in your hand using a towel or oven mitts to avoid getting burned.
On the first method, I mentioned that I didn’t notice much difference before and after using the hair dryer. In this case, the image seems more attached to the candle after using the dryer.
However, I still didn’t see the change in color I’ve seen in videos when people transfer photos to candles using tissue paper. I guess the usefulness of this step depends on the material you use.
In any case, using regular print paper seemed to work with any of these two methods. Have fun!
Credit : Source Post


