
This guide will give you the easiest ways to XXX (e.g. Zoom in on Photoshop).
I’ve been using Adobe Photoshop for many years, and need to XXX (e.g. zoom in to see my designs close up) several times a week.
XXX (e.g. zooming in on Photos) helps you to XXX (e.g. double check to see if your pixels are straight)
Let’s dive into the tutorial.
HIGHLY RECOMMENDED

Download a free copy of Adobe Photoshop to follow along with this simple tutorial.
How to Change Color to Alpha in Photoshop in 3 Steps
What is an Alpha Channel
Before we convert a color to an alpha channel, it’s worth knowing what an alpha channel is.
Alpha channels store the opacity information of each pixel in an image.
This information is converted into grey-scale images and stored as alpha channels.
Why Use an Alpha Channel
An alpha channel can be used in a similar way to a mask. It will reveal or hide areas of an image.
It can be used to manipulate image transparency and is particularly useful when working with fine selections such as smoke or hair.
An alpha channel will preserve a complex selection without creating an extra layer.
The pixels that are represented in the grey scale as black will be fully transparent, and the white pixels will be non-transparent.
The grey pixels will be on a sliding scale between opaque and transparent.
Create an Alpha Channel in Grayscale
We will first create a new alpha channel using a grayscale image. A grayscale image is a black-and-white image.
A grayscale image only has one alpha channel, gray, unlike a colored image, which has RGB, Red, Green, and Blue.
When working with grayscale images, you can quickly and easily isolate black using the alpha channels.
Step 1 – Open an Image
First, open a grayscale image in Photoshop, head to the main menu, and select New > Open.
A pop-up dialogue box will open; use this to locate your image.
Double-click on your image file to open it in Photoshop.
Step 2 – Open the Channel Panel
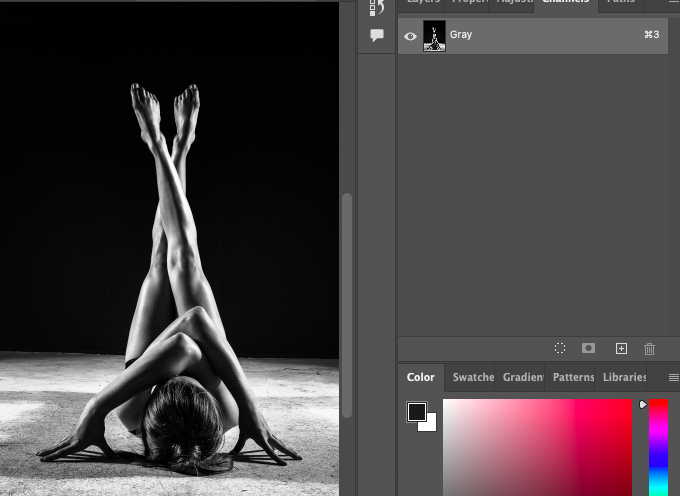
When the image is open, head to the Channel panel.
The Channel panel is usually located beside the Layers panel. If you can’t find it, click Windows > Channel.
In the Channel panel, there should be one alpha channel named Gray.
Step 3 – Create a Selection
We are going to select the white from the image and remove the black.
To do this, hold down the Command key (for Macs) or the Ctrl key (for Windows).
Now click the Gray alpha channel’s thumbnail.
Once clicked, the white sections of the image will be surrounded by marching ants.

Step 4 – Create a Channel
Click the Layer Mask button, the square with a circle inside, at the bottom of the Channel panel.
A new Layer will be created.

Step 5 – Create Layer Mask
Using the Grayscale image, we are going to save the selection using a Layer Mask.
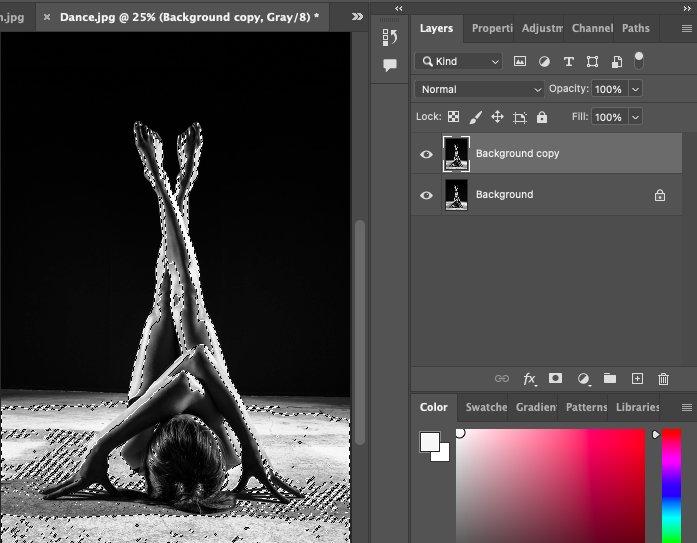
Head to the Layers panel and create a duplicate of the image.
Simply drag the image’s thumbnail onto the Add Layer button at the bottom of the Layer panel.
Alternatively, select Layer > Duplicate from the main menu.
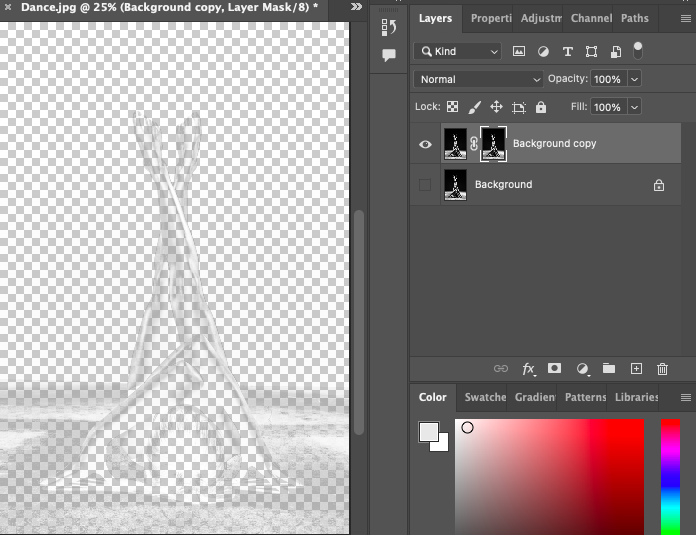
Now click the Layer Mask button at the bottom of the Layers panel.
Or select Layer > Layer Mask > Reveal All from the main menu.
Click the eye icon on the background image. You will now be able to view the white selection.
Step 6 – Save the Image
If you wish to retain the selection’s transparency, save the image as a PNG.
Head to the main menu and select File > Save as.
The Save as dialogue box will pop up, name the image, and designate the location you wish to save it to.
In the box beside Format, select PNG.
If you wish to change the color of the image from Grey Scale to RGB, follow the next step.
Step 7 – Manipulation of the Selections Color
Add a layer by clicking on the Add Layer button. Now select the Paint Bucket tool from the toolbar.
Or click G for the keyboard shortcut.
Click on the new layer to create a block of color to highlight the selection.
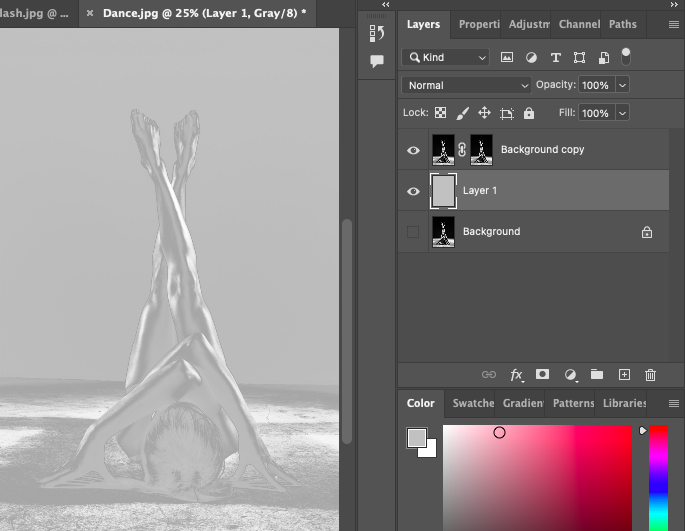
Because the image is set to Grayscale, any color you add will be converted to gray.
If you wish to add a color background, you will first need to convert the image to RGB.
Head to the main menu and select Image > Mode > RGB Color.

Open the Channel Panel, and you will now find there are RGB channels.

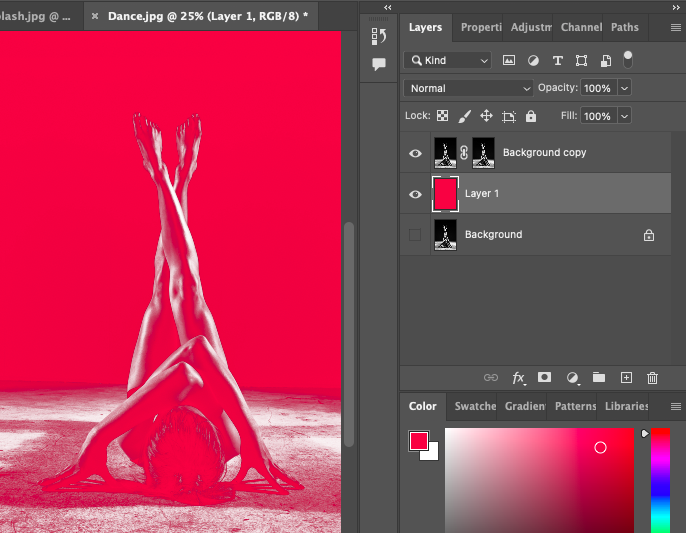
You will now be able to fill the layer, as you can see below.
Step 8 – Change the Color of the Selection
Now that the image is no longer in grayscale mode, you can change the color of the selection.
Double-click on the layer’s thumbnail in the Layers panel.
This will open the Layer Style dialogue window.
Step 2 – Create a Selection
Create a selection of the object or subject by using a selection tool.
For this image, we are going to use the Subject Selection tool.
Head to the main menu and
FAQ
How do you convert an image to alpha in Photoshop?
How do you set alpha in Photoshop?
The first step to make an alpha channel in Photoshop is to create a selection.
Once a selection has been created, head to the Channel’s panel and click the save selection as channel button.
A channel will be created from the selection.
What is color to alpha?
Color to alpha alters the opacity of a selected color in Gimp.
The selected color will become completely transparent.
The closer colors are to the selected color, the more transparent they will be.
How do I change black to transparent in Photoshop?
There are a few ways to change black to transparent in Photoshop.
Use a selection tool to create an active selection of the black area. Then, cut this from the image, Edit > Cut.
The black area will now be transparent. Save the image as a PNG or PSD file to retain the transparency.
Highly Recommended

Check out these 8 essential tools to help you succeed as a professional photographer.
Includes limited-time discounts.
Learn more here
Credit : Source Post


